Mastering Focus Bracketing on Olympus Cameras
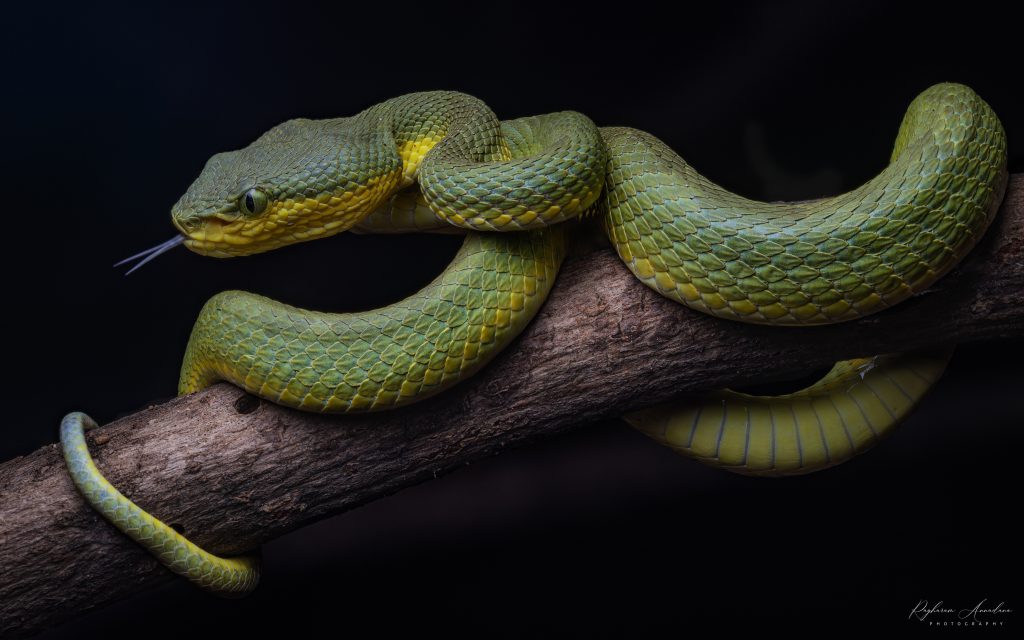
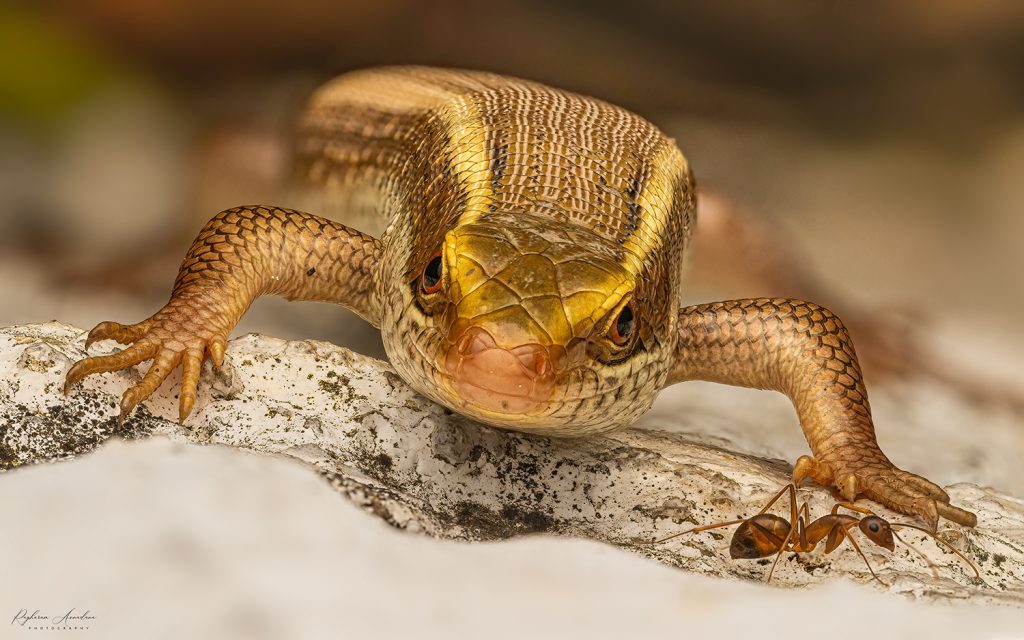
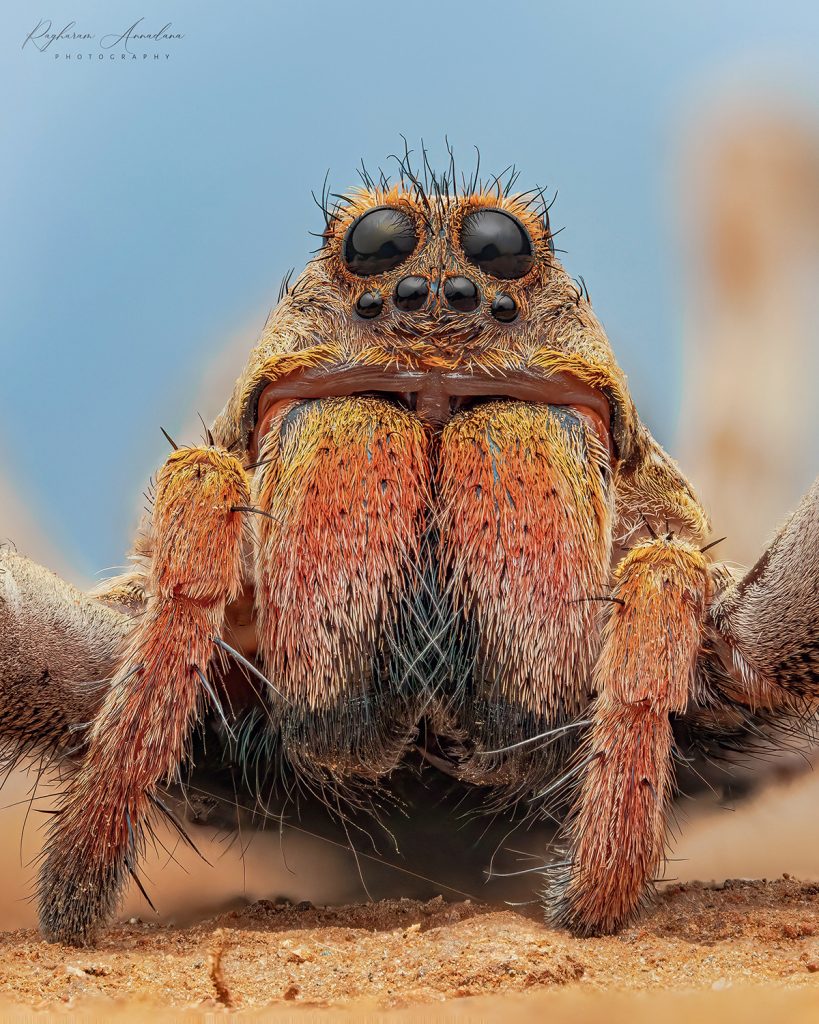
When photographing small subjects like insects, spiders, or flowers, achieving full focus can be tricky. This is where focus bracketing on OM System cameras becomes essential. It allows you to capture a series of images at different focus points, which can be merged later for a photo with incredible depth of field and sharpness. Here’s a short guide to help you in mastering focus bracketing technique on Olympus cameras.
What is Focus Bracketing?
Focus bracketing involves taking multiple shots, each with a different focus point, to capture a broader depth of field. Olympus cameras, particularly in the OM-D series, offer a built-in focus bracketing feature, making the process simple and efficient.
Why Use Focus Bracketing?
In macro photography, the shallow depth of field can leave parts of your subject out of focus. With focus bracketing, you capture the entire subject in sharp detail. This is useful for:
- Macro Photography: Ensures every tiny detail is sharp.
- Close-up Nature Shots: Perfect for capturing leaves, water droplets, or insects.
- Product Photography: Achieves maximum clarity across the product.
How Focus Bracketing Works on Olympus Cameras
Here’s a quick step-by-step guide to setting up focus bracketing on Olympus cameras:
- Enable Focus Bracketing: Go to the Bracketing menu and turn on “Focus BKT.”
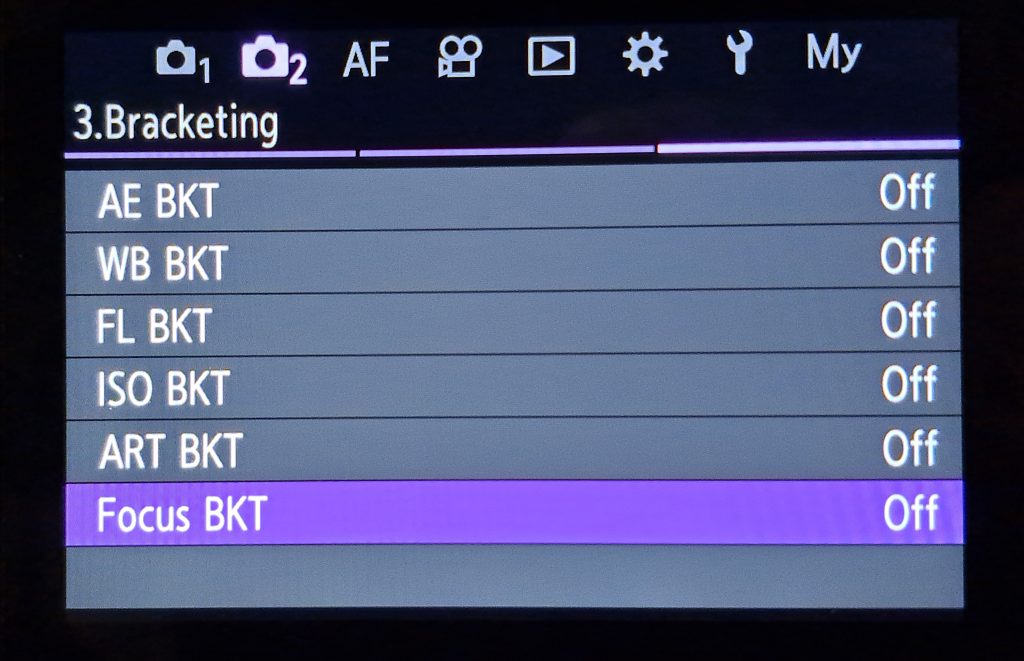
2. Set the Number of Shots: Choose how many images you need for the desired depth.
3. Adjust Focus Differential: Smaller steps for fine details; larger steps for broader subjects.
4. Set Charge Time: Ensure there’s enough time between shots if using a flash.

Once set, focus on the closest point and press the shutter. The camera will automatically capture the bracketed shots. The bracket can be stopped in-between by pressing the Shutter butter, if you have enough shots to cover the scene or wait for the full sequence. The stack can be assembled using softwares like Olympus Workspace, Zerene Stacker, Helicon Focus or Adobe Photoshop.

Tips for Mastering Focus Bracketing
- Handheld Shooting with Flash: Flash sync limits the shutter speed to 1/100s on the OM-1 and 1/50s on the OM-5. Use a fast flash like the Godox 860VIII for faster shooting (10fps) with 0.1s charge time.
- Custom Button Setup: Assign a custom button for quick access to focus bracketing.
- Handheld Focus Bracket: Brace yourself and control your breathing for stability
- Use a Tripod: If handheld shooting isn’t your thing, keep your camera steady with a tripod..
- Lighting: Use diffused flash to reduce shadows and enhance the final stack.
- Experiment: Depending on the subject, you might need more or fewer shots. Practice and adjust as needed.
- Manual Focus vs. Autofocus: For critical details, manual focus may offer better control.

Disclaimer: I am not affiliated with OM System/ Olympus, nor have I received any compensation for this review. All opinions shared are my own, based on my personal experience using the Olympus OM1


2 Comments
VINOD KUMAR V K
Awesome Pics.. detailed review on lens. Very usefull for beginners. The exif details on the images were very much usefull.
One humble request… Please mention how many images were stacked in future articles.
Loved this writeup Raghu.
Thanks a lot
Raghuram Annadana
Thank you Vinod, Don’t remember the exact number of shots for these stacks. But they are in the range of 35-50 images. Will update the article accordingly.