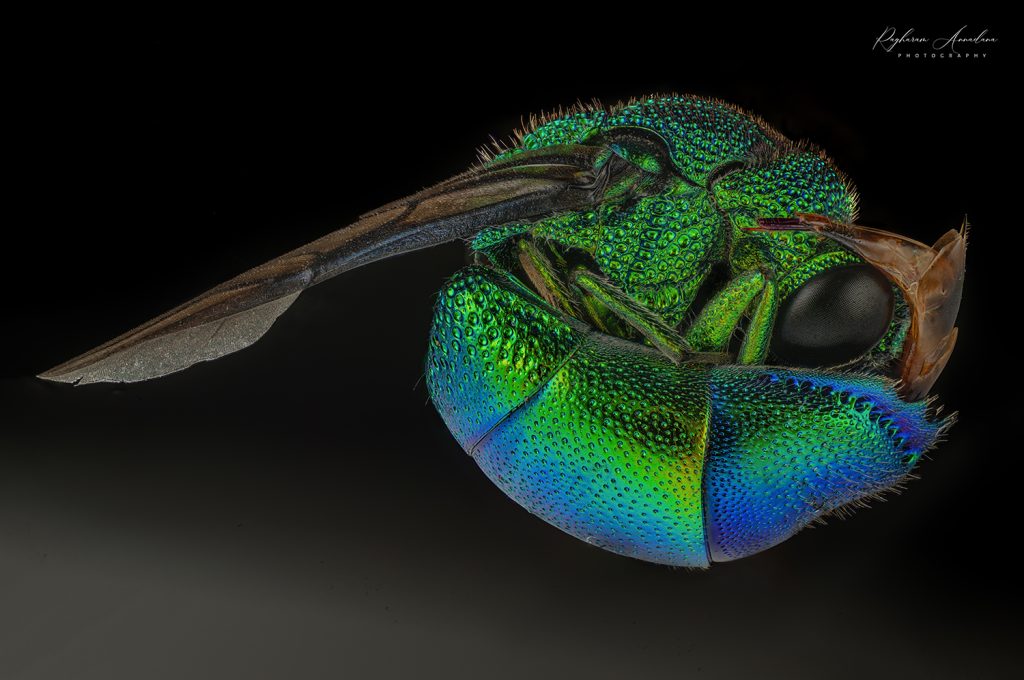
Focus stacking with the WeMacro Rail
In macro and micro photography, especially with extreme close-ups, achieving sharp focus across the entire subject is challenging due to the limited depth of field. Focus stacking addresses this by combining multiple images, each focused on a different plane, into one sharp image. For this, tools like the WeMacro rail are invaluable. Below, I will explain the two WeMacro rail stacking modes and highlight key features that help streamline the stacking process.
Understanding WeMacro Rail Stacking Modes
The WeMacro software offers two primary stacking modes: Distance Mode and Start to End Mode. Both serve similar functions but differ slightly in how they handle focus stacking.
1. Distance Mode
In Distance Mode, you specify the total distance the camera will travel along the rail and the length of each step. Based on these inputs, the software calculates the required number of steps. Here’s how it works:
- Total Distance: The full range over which the camera will move along the rail.
- Step Length: The distance between each focus plane. This should be smaller than the calculated depth of field to prevent focus gaps. A depth-of-field calculator can help determine the optimal step size based on an objective’s numerical aperture.
- Pro Tip: Use the Step Size calculators (found in the Resources section) to determine the optimal step size for your macro or micro photography setups.
The formula for calculating the total number of steps is:
[math]\large
Total\,Steps = \frac{Total\,Distance}{Step\,Size}
[/math]
Once you’ve set the parameters, simply press “Run” to start the stacking process. The software also offers a backlash compensation option, ensuring accuracy by moving the rail to the starting point before beginning the stack.
2. Start to End Mode
Start to End Mode allows you to manually define the rail’s starting and ending positions. After setting these points, the software automatically calculates the number of steps based on the step length. This mode is generally more flexible when the exact travel distance isn’t known beforehand.
Steps for Using Start to End Mode:
- Define the step size between shots.
- Click “Calibrate” to compensate for any mechanical backlash before starting the stack.
- Move the rail to the desired starting point and mark it as “Start.”
- Move to the ending point and mark it as “End.”
Like Distance Mode, it’s crucial to set the parameters carefully and calibrate for accurate results.
Key WeMacro Rail Software Options
In addition to the stacking modes, the WeMacro rail offers several advanced features to ensure precision and stability during the focus stacking process.
Shutter Waiting Time (SWT)
At high magnifications, even slight movements in the rail can cause vibrations that blur the image. To counter this, Shutter Waiting Time (SWT) allows you to set a delay (usually a few seconds) after each step movement to ensure the setup stabilizes before the camera takes the next shot.
Shutters per Step
Some cameras require multiple shutter activations per step. For example, when using a DSLR in the mirror lock-up mode, two shutter activations are required. Similarly, in HDR bracketing, multiple exposures are needed per step. The Shutters per Step option lets you configure how many times the shutter is triggered at each position to accommodate these requirements.
Interval Between Shutters (IOS)
This setting defines the time gap between multiple shutter activations per step (if applicable). The Interval Between Shutters (IOS) setting is chosen such that it is longer than the exposure time, ensuring there is enough time between shots for the camera to process the images, recycle the flash, and stabilize the camera from the minute vibrations from the shutter release.
Backlash Compensation
Mechanical parts often have slight gaps or play, known as backlash, which can cause focus shifts during stacking. The WeMacro rail compensates for this by adjusting for a predefined backlash value (typically around 220 microns). This ensures consistent focus as the rail moves back and forth, maintaining accuracy throughout the process.
Here’s a flow graph for the rail sequences through various steps. In this example, I have assumed 2 shutters per step.

Running the Rail
Once all the parameters are configured for the WeMacro rail stacking modes—either the Distance Mode or Start to End Mode—you can run the rail to complete the focus stack. During the stack execution, you can monitor progress and even stop the process if needed. At the end of the stacking sequence, the rail will display a “stop” button, which must be pressed before starting a new stack.
Controller Options
The WeMacro rail can be controlled via multiple platforms, offering flexibility in how you set up and manage your focus stacking sessions:
- PC (via USB or Bluetooth)
- Mac OS (via USB or Bluetooth)
- iOS and Android (using Bluetooth 4.0)
Each platform has its dedicated app or program for configuring stacking parameters and controlling the rail. The Bluetooth option is especially convenient for mobile setups, while USB ensures a more stable connection for extended stacking sessions.
Which Mode Should You Use?
In my experience, Start to End Mode is often the more intuitive option. Physically moving the camera to the starting and ending points makes it easier to set up, and this mode allows for more flexibility when the exact distance isn’t known in advance.
While Distance Mode offers precise control, I’ve found it to be less useful in photomicrography, where positioning is more hands-on and trial-and-error. I rarely use this mode as the benefits don’t outweigh the simplicity of Start to End Mode in most situations.
Conclusion
The WeMacro rail provides robust focus stacking capabilities, making it an invaluable tool for capturing sharp, well-focused images in both macro and micro photography. The WeMacro rail stacking modes—Distance Mode and Start to End Mode—and a variety of customizable options, offers flexibility and precision to meet a range of photographic needs.


2 Comments
Baleed Vishnu Reddy, MD.
What is the best way to contact you ? need to discuss your Wmacro setup to microscope.
Thank you,
Vishnu
Raghuram Annadana
Hi Vishnu, Sure please feel free to contact me at contact[AT]macrobyraghu.com