Zerene Stacker: A Guide to PMAX and DMAP
Focus stacking has become essential in macro and microscopy photography, allowing photographers to create images with remarkable depth of field. Zerene Stacker, one of the top software tools for focus stacking, offers two powerful stacking methods: PMAX and DMAP. Each method has unique strengths and ideal use cases, making it valuable to understand their differences to achieve the best results for any subject.

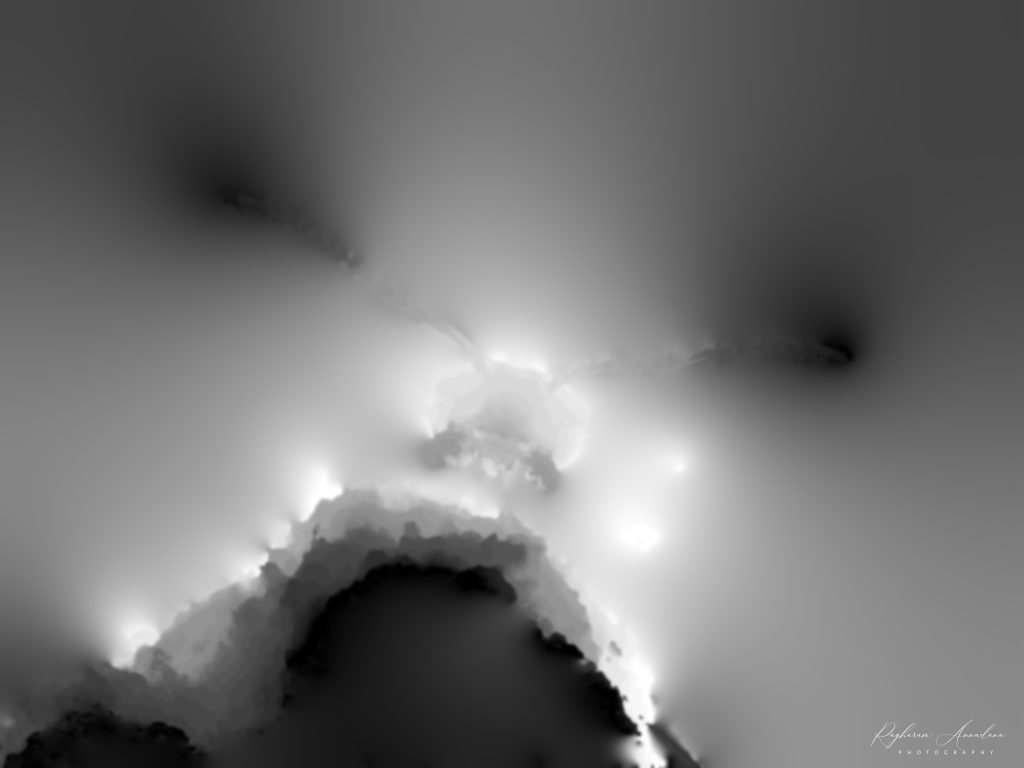
PMAX (Pyramid Maximum Contrast)
PMAX is Zerene Stacker’s “pyramid-based maximum contrast” method, designed to capture and emphasize the finest details in a scene. This algorithm analyzes images in multiple layers or “pyramids,” selecting pixels with the highest local contrast to build the final image.
How PMAX Works
- The software scales each source image down through several steps, forming a “pyramid” of resolution levels.
- At each level, it measures the local contrast around every pixel.
- For each pixel location, it chooses the source image showing the highest contrast.
- The final image combines these high-contrast selections from all levels.
Advantages of PMAX
- Fine Detail: Excellent for handling intricate details and textures.
- Sharpness: Typically produces sharper images.
- Best for “Busy” Subjects: Excels with textured subjects like insect eyes or feathers.
Limitations of PMAX
- Artifacts: Can produce artifacts in smooth, out-of-focus areas.
- Harsh Transitions: May show sharp, unnatural transitions in some parts of the image.
- Noise Amplification: Prone to amplifying noise, especially in deep stacks.
- Alignment Tolerance: Poor results when there are slight misalignments between frames
- Colours: May alter contrast and colours

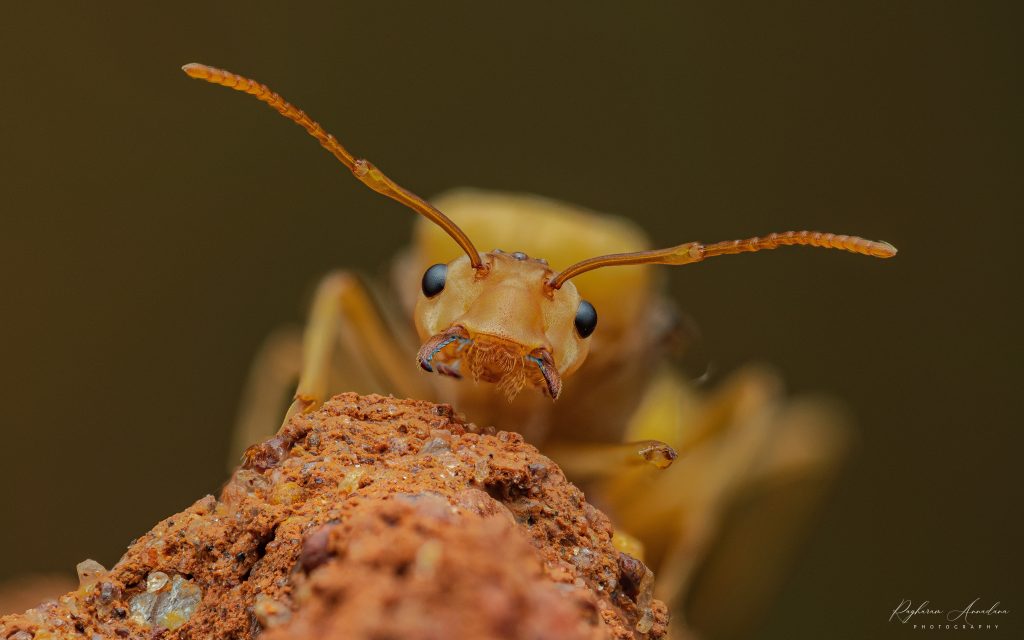
DMAP (Depth Map)
DMAP uses a different approach by creating a depth map of the subject to blend images smoothly. It’s particularly effective for subjects with smooth surfaces and gradual transitions, where PMAX’s sharpness might create unwanted artifacts.
How DMAP Works
- DMAP analyzes the focus position in each image.
- It creates a depth map representing the focused areas across the stack.
- This map is used to determine ideal blend boundaries between images.
- Smoothing algorithms are applied to ensure gradual transitions between focus zones.
Advantages of DMAP
- Smooth Transitions: Produces natural, seamless transitions between focused areas.
- Reduced Artifacts: Minimizes halo effects around high-contrast edges.
- Realistic Rendering: Ideal for smooth surfaces and subjects with gradual depth transitions.
- Better for Movement: More effective at handling slight subject movement or misalignment.
- Colours: Best for rich tone and color, does not alter color/contrast
Limitations of DMAP
- Fine Detail: May struggle to capture very fine overlapping textures.
- Softer Results: Generally softer than PMAX, especially for highly textured subjects.
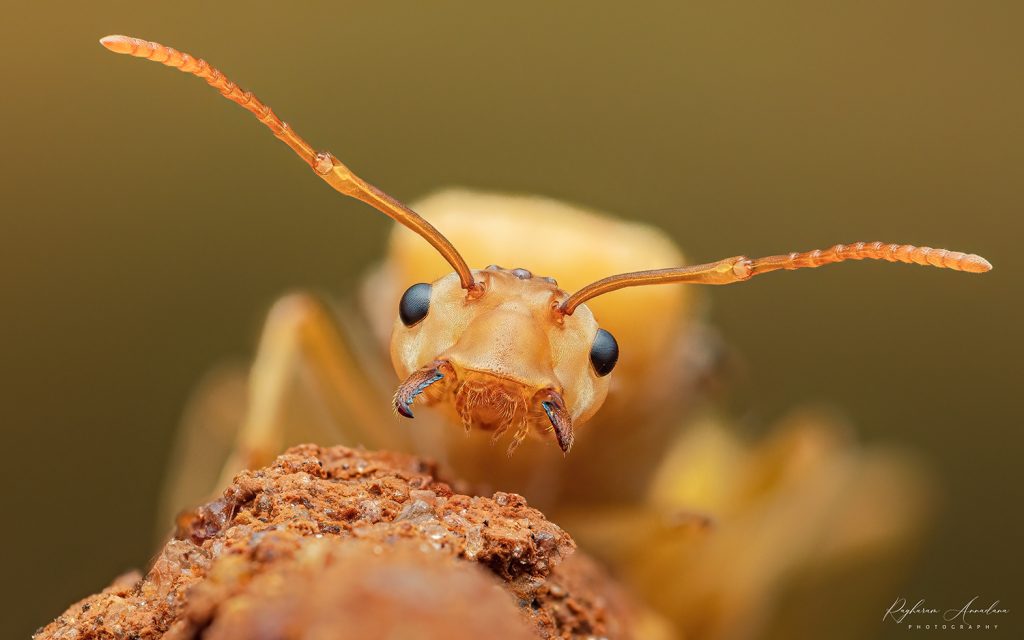
PMAX vs. DMAP: Which One to Use?
Choosing between PMAX and DMAP in Zerene Stacker, depends on your subject and priorities. Here’s a quick guide:
| Aspect | PMAX | DMAP |
|---|---|---|
| Best For | Intricate detail (Bristly bugs, feathers, plant textures) | Smooth surfaces (petals, polished minerals) and gradual depth transitions |
| Sharpness | High sharpness and fine detail | Smoother, more natural transitions; may be softer |
| Artifacts | Prone to artifacts in smooth, out-of-focus areas | Reduced halo and artifact issues |
| Handling of Movement | Sensitive to alignment errors | Handles slight subject movement effectively |
| Noise | Can amplify noise, especially in deeper stacks | Lower noise output, especially in smooth surfaces |
| Ideal Image Count | Fewer source images needed to achieve sharp results, well-aligned stacks | Performs better with larger and deep stacks |
Use PMAX for:
- Subjects with intricate detail (overlapping texture, like hair, feathers, etc.)
- When maximum sharpness is priority
- Textured surfaces
- When working with fewer source images
- Well-aligned image set
Use DMAP for:
- Smooth surfaces (petals, polished minerals)
- Subjects with gradual depth transitions
- When natural-looking transitions are crucial
- Situations with slight subject movement
Best Practices for Stacking with PMAX and DMAP
To get the best results, consider these practical tips:
- Try Both Methods: Often, processing the stack with both PMAX and DMAP allows you to compare results and pick the best one.
- Hybrid Approach: For complex subjects, process different parts of the image with each method and combine them during retouching.
- Retouching: Both methods may require some retouching, particularly in challenging areas like transitions between in-focus and out-of-focus regions.
- Image Alignment: Proper alignment of source images is crucial. In some handheld stacks, it’s possible that all images of the stack do not align well. This can be resolved using sub-stacks of a smaller number of images.
- Deep Stacks: For deep stacks, you can manage PMAX noise by dividing the images into smaller sub-stacks, which reduces overall noise.
Conclusion
Mastering PMAX and DMAP in Zerene Stacker empowers photographers to make informed choices based on subject matter and desired results. PMAX excels in preserving fine detail and sharpness, while DMAP is ideal for smooth transitions and natural results. By understanding when to use each method—or combining them—you can bring out the best in your macro and microscopy photography.


6 Comments
Vinod Kumar VK
very well explained.. in simple terms.. this is a must understand subject/theory for stacking. DMAP really gives a sharp texture but allignment it misses.. i felt.. as of now.. i stack both and work on DMAP image choosing the PMAX as source..
This article made me understand more on the subject.
Thanks for the detailed review.
Regards
Raghuram Annadana
Hi Vinod, Thank you.. Yes, that is the correct workflow and using the base image as DMAP and then retouching it using PMAX and input source images will yield the best results.
Umesh B Thammaiah
Hi Raghu
Macro photography is the art of capturing extremely close-up images of small subjects, allowing fine details to be visible to the human eye. Achieving sharp focus and clarity in macro shots can be challenging, it is well explained with the right techniques in article which helps to capture stunning images of tiny worlds.
Depth of Field (DoF) in macro photography is very shallow due to the extreme closeness of the subject. The writeup easily explains to create stunning, high-quality macro images, capturing the intricate details of nature or showcasing everyday objects in an entirely new way.
– Umesh B Thammaiah
Raghuram Annadana
Thank you Umesh, glad it was helpful !
Hari
Hi Raghu, as an amateur macro photographer who struggles with focus stacking (using a manual lens) this site is a Gold mine to learn the techniques.
Keep doing the good work. If there was a patreon i would subscribe immediately 😄. Hope to meet you in person someday.
Raghuram Annadana
Hi Hari,
Glad you find it useful. I have a bunch of articles that I am still working on, which I hope will be useful to the macro community. Yes, we could meet up sometime.
Regards,
Raghu